T-Shirt Forums banner

How to Make your own Plastisol Transfers

1 reading
142K views 95 replies 63 participants last post by  splathead  
#1 · (Edited by Moderator)

PLEASE NOTE: No, you can't print plastisol transfers from a home printer. You need screen printing equipment to print plastisol transfers :)

This article is more for someone who is already doing screen printing directly onto t-shirts and has the equipment already to do screen printing.

Plastisol transfers are not something that comes from an inkjet or laser printer or something that is done at home.

Normally, when people need plastisol transfers, they outsource them to a company that does transfer printing. Here's a list:

http://www.t-shirtforums.com/heat-press-heat-transfers/t4095.html


I have read some threads were forum members ask about making Plastisol Transfers.
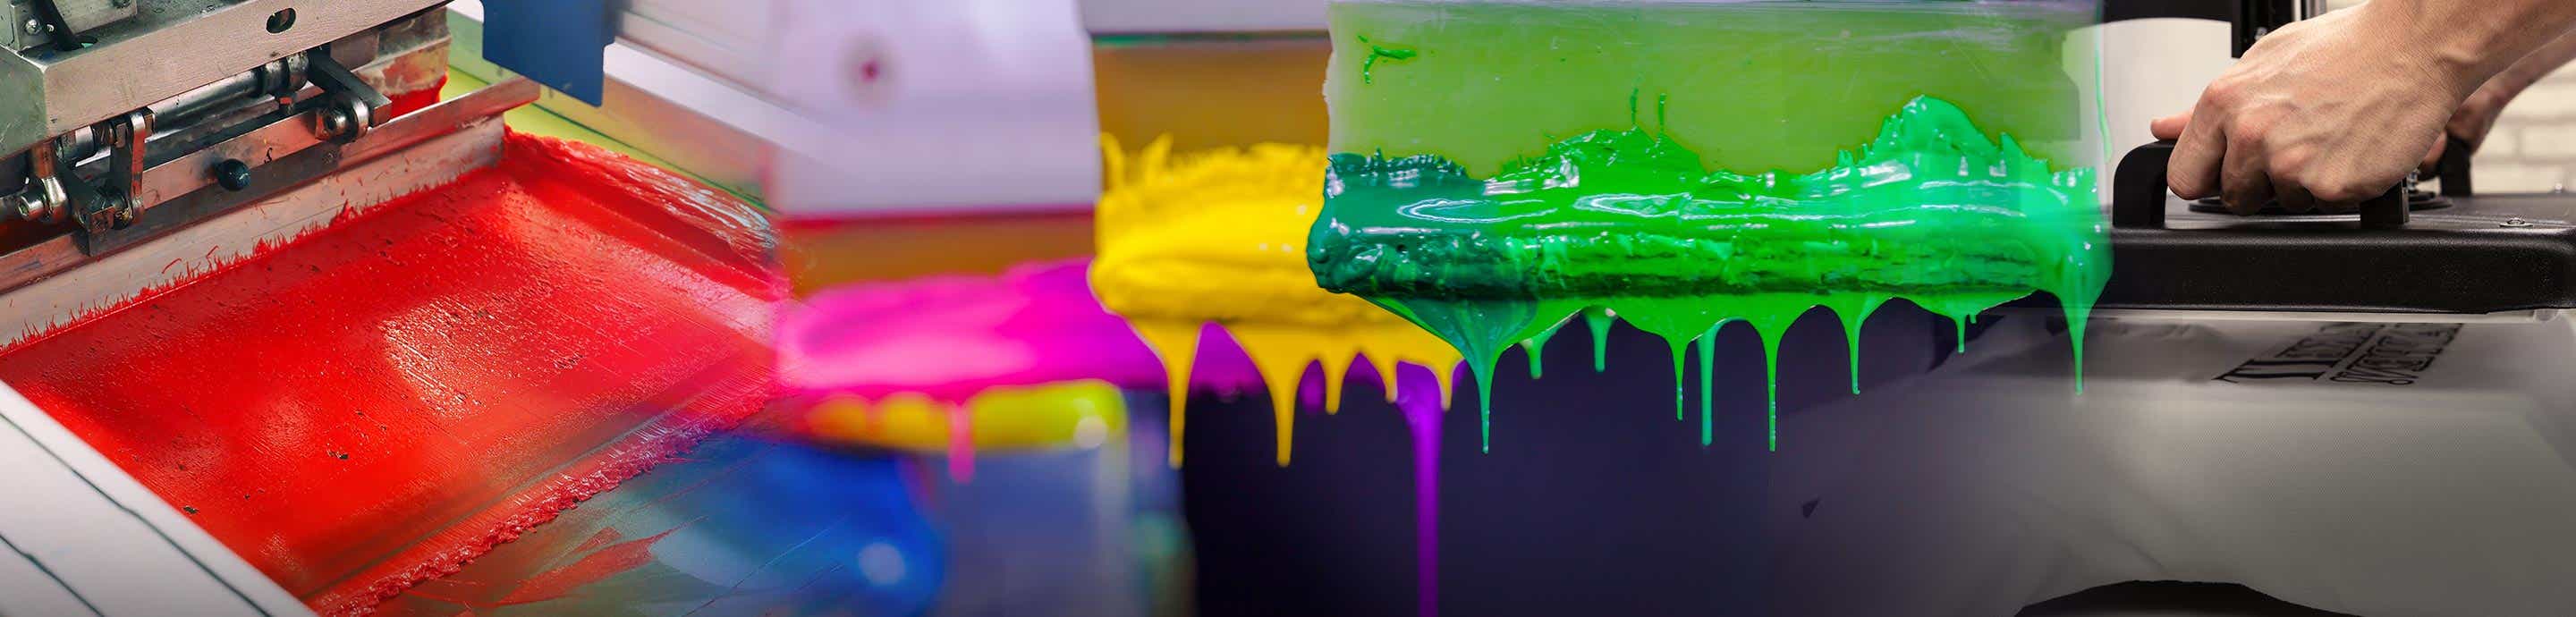
This is a very easy thing to do and does not differ much of doing it directly to the shirt. Only a few different steps.
I prepared a graphic with the steps and a few images to explain how this works.
Read it and you will be doing plastisol transfer in no time.

Image


If you dont understand something, ask me, I will be glad to explain.

Important notes:
• Plastisol Transfers work great with Union Ink Ultra Soft Plus Inks, this are the ones I use and I have had no problems. Regular plastisol inks dont work. I dont know what other inks will work, if anybody knows, post it here.
• You might clean the base plate after you make the registration with the adhesive tape (step 7).
• Multi color designs can also be printed with this method.
• Dont forget to use adhesive spray to hold paper in place.
• Dry paper using conveyor dryer or spot dryer, using a heat gun is ok too, but heat might not be uniform trought the paper.
• This is obvious but just in case, place printed side facing shirt and back of paper facing the heat press.
• I have used yellow, blue and green over dark shirts and I didnt need a white basecoat.

I hope to be helpful!
 
#7 ·
Re: Make your own Plastisol Transfers

Step 5 (printing onto the platen) is unnecessary, and a bad practice in my opinion. You can easily register the paper with tape as in step seven without messing up your platen.
You are right Solmu, I agree with you as I dont print on the platten anymore, as it is not hard to do it as you say, but I did it like that at the beginning and I thought that is the easiest way to explain it to peole that has never done it, anyways they were going to figure it out just as I did.
Thanx for posting and keep the comments and suggestions, me and other forum members will be thankful for it!
 
#6 ·
Re: Make your own Plastisol Transfers

I agree with Lewis on that #5 deal. I've made transfers and that is a no-no. And if your not going to use a vacuum platen to hold the paper down, get some unilan powder or something esle for transfers to take the tack off the paper: if you use sticky to hold it in place for multi-colors. If you don't, the paper will stick to the print.

.
 
#9 ·
Thanks for the info on how to make plastisol transfers Titere! I have a couple questions

1. What is the best way to "gel" the transfer

2. Is it possible to use, say, Duracotten HT transfer paper so you don't have to cut around your transfer? (I will be starting with 1 color Tee's if anyone has any suggestions)

Thanks again for the post (I was beginning to think the plastisol process was a big secret!)
 
#14 ·
So does anyone know what the best way to gel the ink? Also, how thick should the ink be on the paper?
The best way to "cure the ink is a conveyor dryer. Be careful not to over or under cure, especially on the subsequent passes through the dryer for multi-color transfers.

The thichness of the ink is determined by the thichness of the emulsion on the screen and the type of ink being used. All of the ink manufacturers will give you their specs for mesh count, stencil thickness, cure temp. Combine that with a little experimentation.

If you're making multi-color plastisol transfers, one crucial step taht was left out is to run the paper through the dryer first to preshrink the paper before printing the first color. Most transfer papers will shrink a little, enough to cause registration issues.

Also, there are different papers for hot peel and cold peel transfers.

And there are several adhesive powders available that are great for decreasing dwell time when printing and increasing the opacity of the inks.
 
#19 ·
If you have a screen printing setup you can. But if you have a screen printing setup, then you can just screen print the plastisol directly on the t-shirts and you don't really need to do transfers.

If you don't have a screen printing setup, then you can just outsource the plastisol transfers (which is what most people do) to a company that does that type of printing. You send them your design, they print the transfers and send you the transfer sheets for you to heat press at home:

http://www.t-shirtforums.com/heat-press-heat-transfers/t4095.html

This thread is an article for people who are already screen printing and they want to add plastisol transfers to their existing business.
 
#21 ·
Thanks, this was extremely useful. As I posted in another thread before I was pointed here:

I ask because we have the opportunity to get our hands on some good screening equipment cheap.

Now we wouldn't want to bust out the ink and screens everyday when orders come in because it would be a nightmare and a mess -- so what I'm thinking is screen them onto transfer paper, store, transfer later.

That way transfers can be made maybe once per week and quickly used when needed. Does this make sense to do? Is it worth it when the numbers come down to it? Anyone have experience/links? I'll continue searching, but figured I'd tack onto this thread.
Now obviously there will be some trial and error in the beginning, but looking at the cost of the sheets this would be MUCH cheaper than outsourcing the creation of the transfers.
 
#22 ·
What if i am doing several colors. Can we flash between colors? Also, is there a clear gel that goes on as the last coat. I had ordered some transfers and they had a glossy look on the back side before applying. What degree does my dryer have to be on and for how many seconds does it dry go through at that temp?
 
#24 ·
hi I am very interested in any additional information that you may be able to send in addition to this post. Is there any way to orint these transfers from your own office printer ( I have only done a few hours of research on this topic and greatly appreciate any input at this time. thanks so much.
 
#25 ·
No, you can't print them from a home printer. You need screen printing equipment to print plastisol transfers.

This article is more for someone who is already doing screen printing directly onto t-shirts and has the equipment already to do screen printing.

Plastisol transfers are not something that comes from an inkjet or laser printer or something that is done at home.

Normally, when people need plastisol transfers, they outsource them to a company that does transfer printing. Here's a list:

http://www.t-shirtforums.com/heat-press-heat-transfers/t4095.html
 
#28 ·
We've run into a little problem printing our homemade plastisol transfers on dark shirts. We created a gold transfer, went through all the appropriate steps, and heat-pressed it. It worked out beautifully except that we see a "haze" around the image from the powder. Hadn't noticed this before when we printed on dark mesh basketball jerseys, but it's quite obvious on the black tees. Too much powder?? Any suggestions?
 
#31 ·
If anyone is interested I make 1000's of plastisol transfers on a simple home made vacuum table.
I took a piece of plywood with formica and drilled small holes in a pattern the size of my paper. (looks like the grid on Coreldraw) I then put the sheet of wood on frame, can be a wooden silk screen frame, and put another piece of plywood on the base (without holes). In the base or from the side, drill a hole and connect a household vacuum cleaner. This will hold the paper down. You can put tape over the holes if you have smaller paper.
On the board with the holes put hinges with clamps (available from silk screen supplies and you have a simple vacuum table.
For one color designs I buy paper from a bakery supply, they have paper that stops the cakes sticking to the pan. It has a silicone coating and it's really cheap. You don't need transfer paper for one color designs.
I run the sheets through my oven on a low temp or very fast so the ink gells. You can also use a flash.
I usually use powder adhesive (I use Union) to improve the adhesion. You put this powder in a tray a slide the printed paper over it, ink side down and then shake the excess glue off.
Simple and cheap and works really well.
 
#32 ·
If anyone is interested I make 1000's of plastisol transfers on a simple home made vacuum table.
I took a piece of plywood with formica and drilled small holes in a pattern the size of my paper. (looks like the grid on Coreldraw) I then put the sheet of wood on frame, can be a wooden silk screen frame, and put another piece of plywood on the base (without holes). In the base or from the side, drill a hole and connect a household vacuum cleaner. This will hold the paper down. You can put tape over the holes if you have smaller paper.
On the board with the holes put hinges with clamps (available from silk screen supplies and you have a simple vacuum table.
For one color designs I buy paper from a bakery supply, they have paper that stops the cakes sticking to the pan. It has a silicone coating and it's really cheap. You don't need transfer paper for one color designs.
I run the sheets through my oven on a low temp or very fast so the ink gells. You can also use a flash.
I usually use powder adhesive (I use Union) to improve the adhesion. You put this powder in a tray a slide the printed paper over it, ink side down and then shake the excess glue off.
Simple and cheap and works really well.
I use 110 mesh and whatever ink I would use for direct printing. For dark opaque.